- Welcome to PACKMAGE
-
Language: English
- Login
- Create your ID now

Click on the button after "Paper" to open the control panel of materials management.
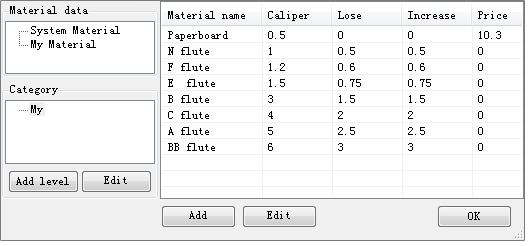
Materials from system are read-only. By clicking "My Material", then "Add" or "Edit" , we can add or edit materials according as we need them.
Click on the button labelled "Add" below the window to open the control panel of add material:
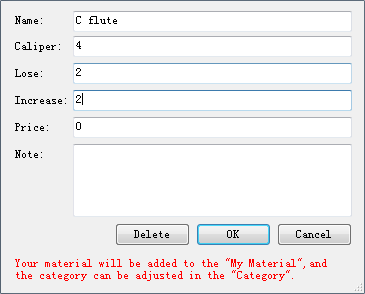
what do in-Lose and out-Gain stand for, for reference: in-Lose and out-Gain.
Caliper of board should be the sum of in-Lose and out-Gain.
Unit price stands for the cost per square meter, reserve field, useless for now.
The new material will be classed to "My Material" automatically.
Click on the button labelled "Add level" below the window to open the control panel of groups management.
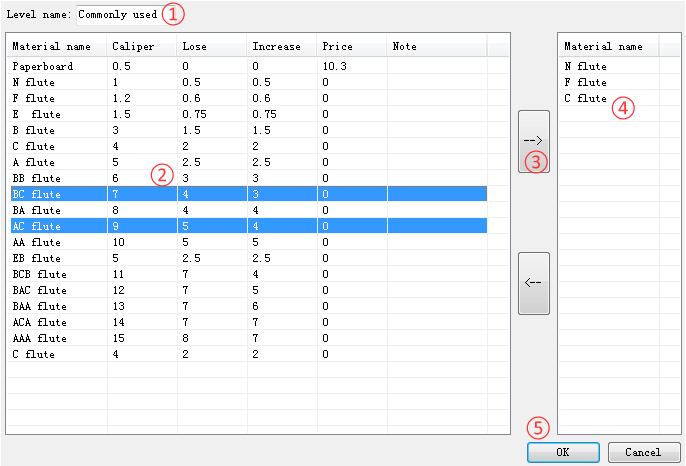
If we have added a new material, it doesn't mean that the material can be selected from the paper options in design panel.
In practice, the paper drop down shows the materials belong to current level only, which is set in the control panel of Material by selecting the one from level list and clicking ok.
PACKMAGE TECHNOLOGY CO.,LIMITED